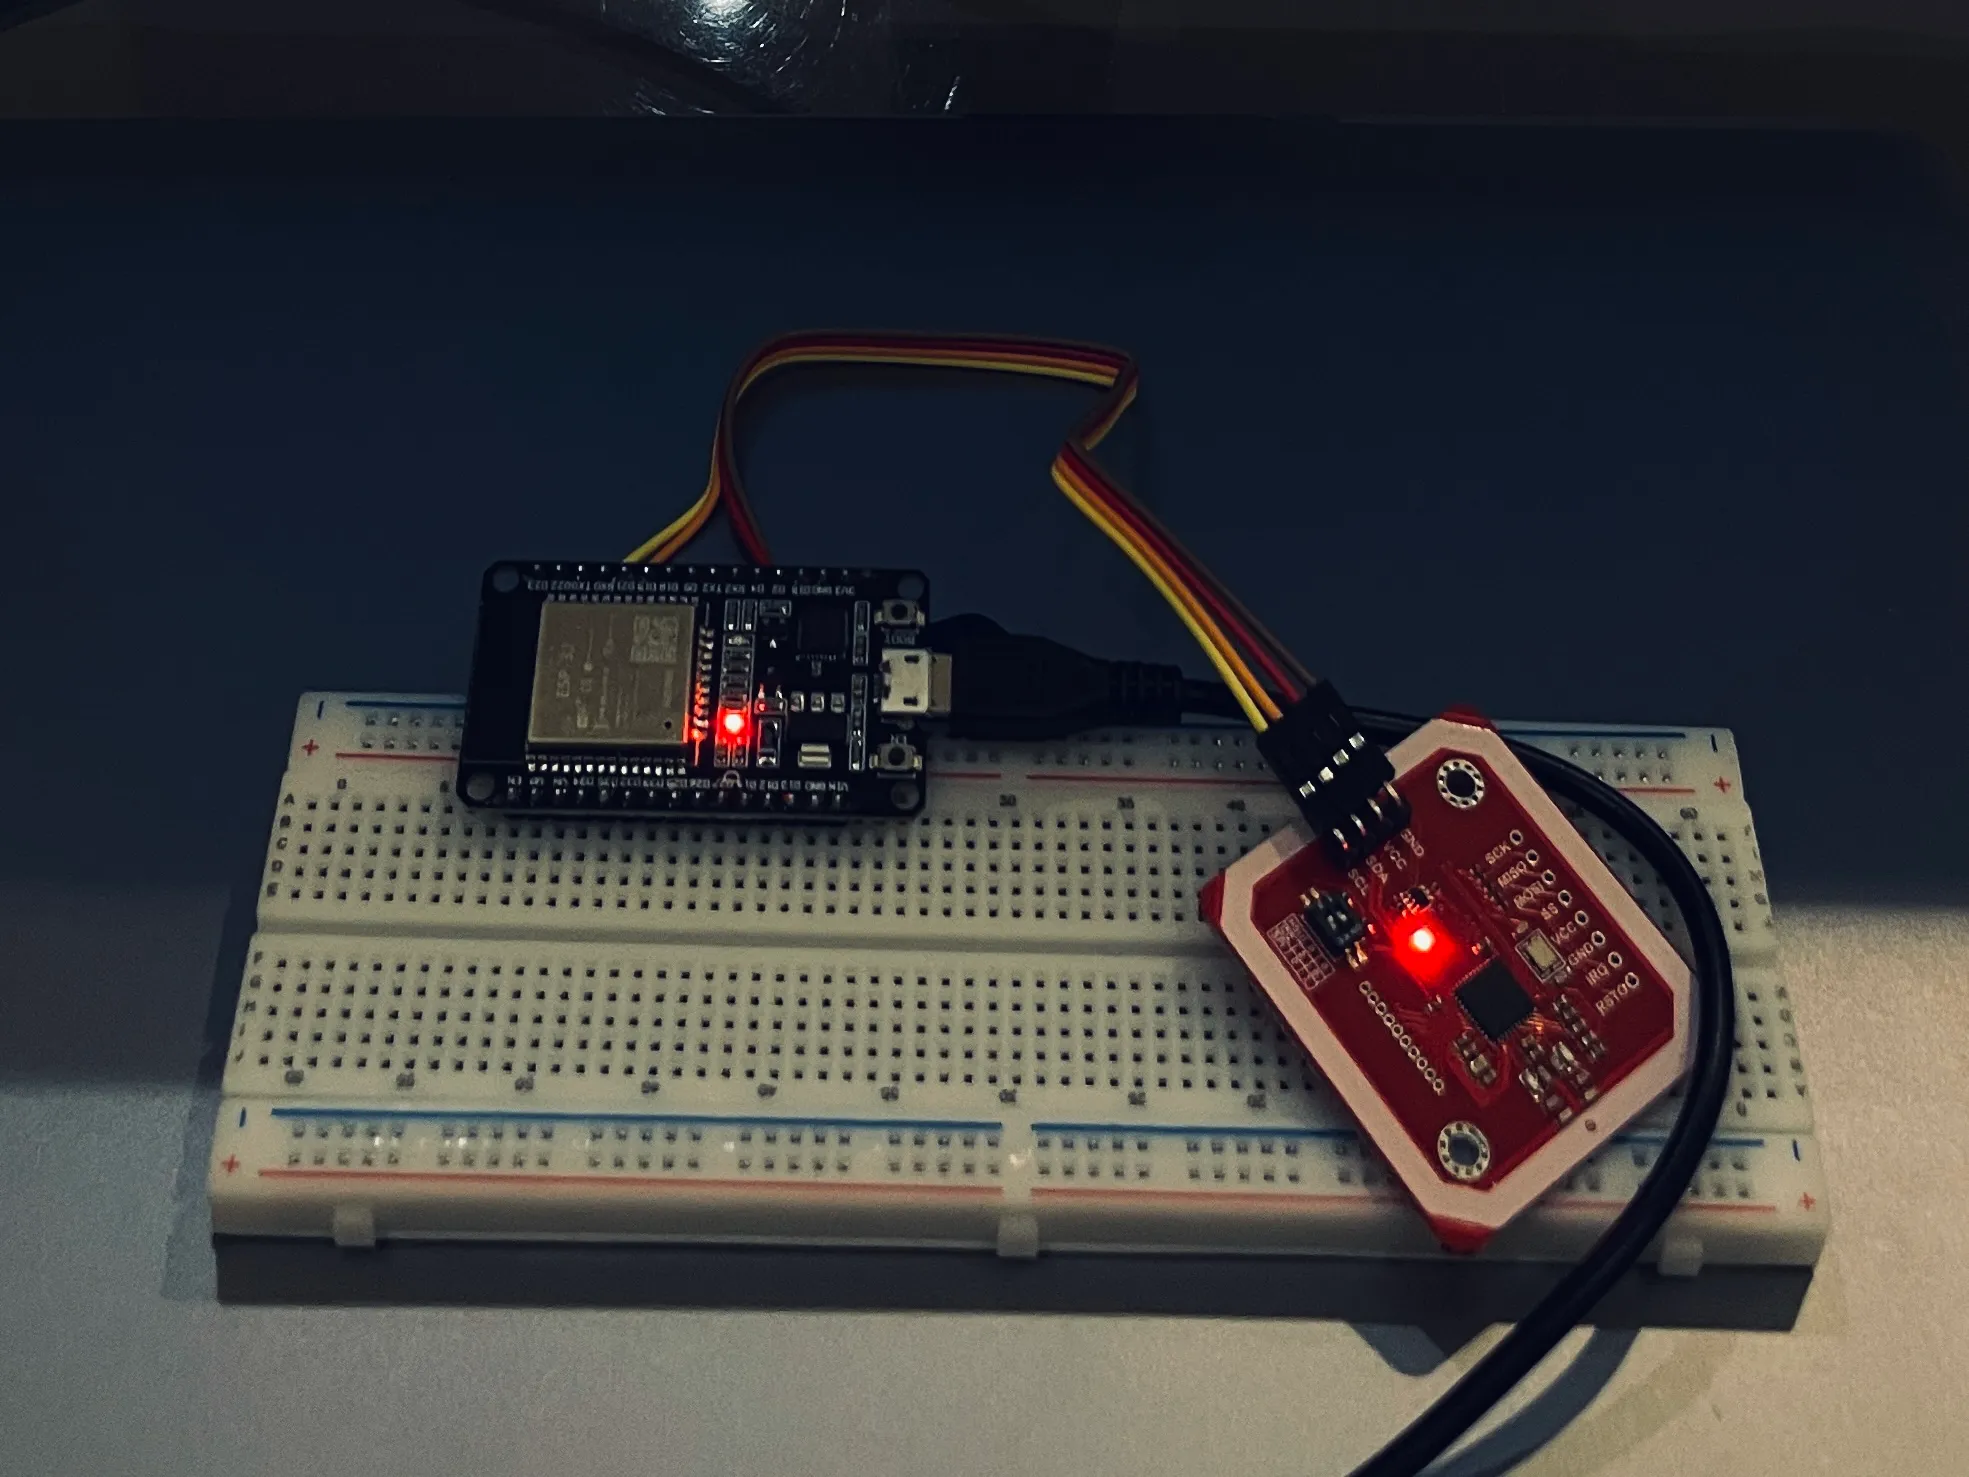
This weekend, I did a project to learn about embedded systems, especially with the ESP32, which is the first microcontroller I got. The project I chose was to clone an NFC room card, which I used later for my own room lock, so no one’s room was in danger of a break-in during the making :) For that, I bought an NFC module, the PN532, from AliExpress.
First thing, I set up the wiring. After some research, I went with this configuration:
PN532 VCC → ESP32 VIN (5V) /* it's not recommended to use the 5V with RC522, if you are using it, as it's power limits is (2.5 ~ 3.3V),  based on this blog [1] */
PN532 GND → ESP32 GND
PN532 SDA → ESP32 D21 (GPIO21)
PN532 SCL → ESP32 D22 (GPIO22)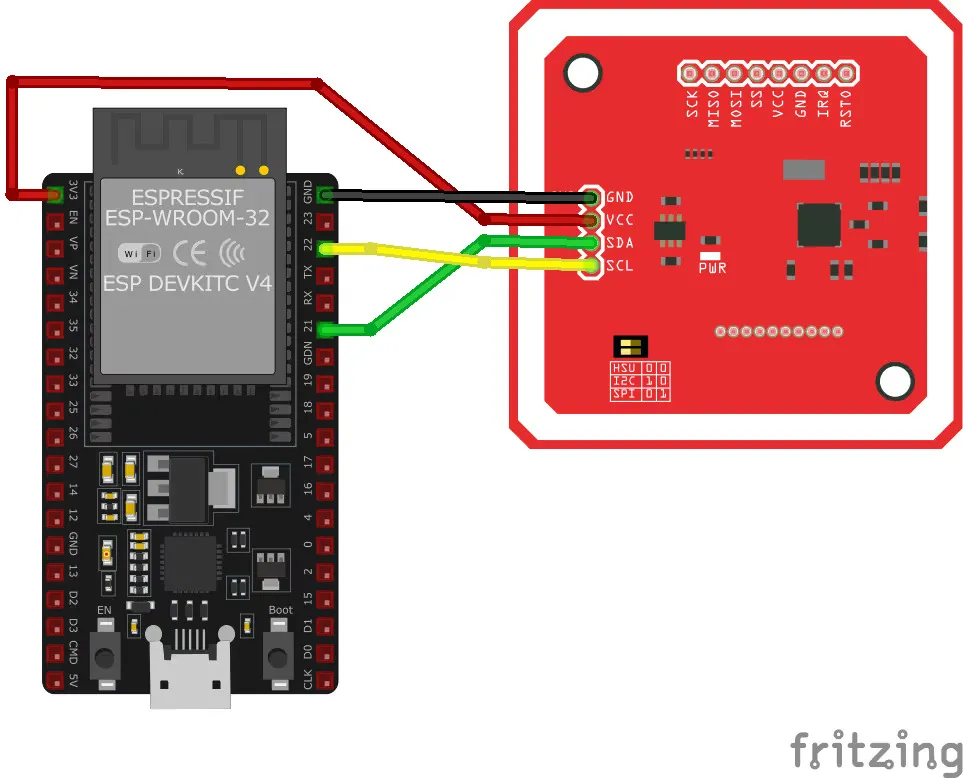
On the PN532 module itself, I set the DIP switches to ON=1 and KE=0 to enable I2C mode. And to find the exact port for the ESP32 on my Mac, I used the command ls /dev/cu.* and wrote the port number in my platformio.ini file. (I’m using PlatformIO rather than the Arduino IDE, for some reason, it’s really lagging on my device, so I just left it, I’ll look into it more later ).
I then used the code found in a basic tutorial [2] to test the wiring, but the PN532 could not be identified. I suspected that using a usb-hub was the problem, so I moved everything to my PC where I could plug the ESP32 directly in. I redid the wiring again, and it worked. I’m not 100% sure if the problem was the usb hub, as the PN532 connection wasn’t at all times, but I think it might have been the case.
Now I got the PN532 to actually read the UID of the NFC card, but my ultimate goal was to read from the NFC card, store the data, and then write it to another NFC tag so it would actually act like the original.
To do so, it was straightforward if conditions. If the NFC UID is read, then pause delay, and then write if a new tag is detected. When you look at it in an abstract way, this gives the program two states to go through: reading and writing. So inside the loop() function, I established these conditions: if (programState == 0) { … } else if (programState == 1) { … }
In state zero (the initial state), it reads and in state one, it writes to the other card. And it worked! It copied the UID from the first NFC card and yanked it to the other one. I had to test it on my room’s door, but I was disappointed when it didn’t unlock the door. Even though I reread the cloned tag and saw the logs telling me they both had the same UID, so something else must’ve been the issue.
After researching and having conversations with gemini pro 2.5, I came to understand that some locks don’t use the simple UID but rather other data stored in other blocks on the card’s memory. The suggested approach was to dump all the data blocks and look for a piece of data that might seem relevant.
It was established that the card is a MIFARE Classic 1K (I found that out with a script used to identify NFC cards i found online), this type of card has exactly 64 blocks of memory, which looks something like this:
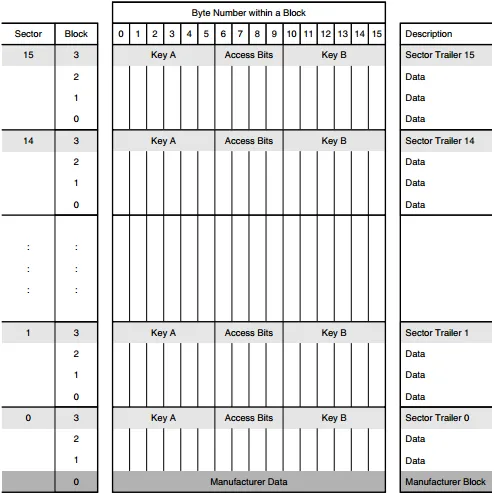 For MIFARE Classic cards, the default access key is often FF FF FF FF FF FF. I decided to use that key first to see if it would let me read the protected data blocks, and it did! :D
After running the dumper script and scanning the card, I got the following result:
UID Value: 0xCD 0xAB 0x12 0xEF
Block 00:  AB CD EF 12 34 88 04 00 01 02 03 04 05 06 07 08
Block 01:  00 00 00 00 00 00 00 00 00 00 00 00 00 00 00 00
Block 02:  00 00 00 00 00 00 00 00 00 00 00 00 00 00 00 00
... (many empty blocks) ...
Block 15:  00 00 00 00 00 00 00 00 00 00 00 00 00 00 00 00
Block 16:  8A E4 33 1B 99 01 FF 07 11 C2 45 78 B3 9F D6 A0
Block 17:  00 00 00 00 00 00 00 00 00 00 00 00 00 00 00 00
... (rest of the blocks were empty) ...
And this was a dead giveaway for what I had been looking for. As I said, Block 00 contains the UID, which I already tested and didn’t work. Now I only had Block 16 to test out.
I used the same previous state-based script, but this time the focus was on Block 16, copying it from the original card and yanking it to exactly Block 16 on my empty NFC tag.
I then tested it on the door lock, and it worked finally! The door was unlocked
To be honest, there were some frustrating moments I skipped, from the initial wiring to the unstable I2C connection, but it was a fun little project all in all. I preferred not to share the scripts, for I believe it might not be the best idea for people’s security, but I had to share the experience.
Resources:
1: RC522 vs PN532 Comparison Guide
3: A Practical Attack on the MIFARE Classic (paper)